By default the P1 ethernet reader is configured for DSMR 4/5. If you have an older reader with DSMR 2 or 3, than you’ll need to change the serial settings. Below I’ll describe what serial settings are used for DSMR 2, 3, 4 and 5. For some this is already known, for others this can be “abracadabra” 🙂
DSMR 4 and 5
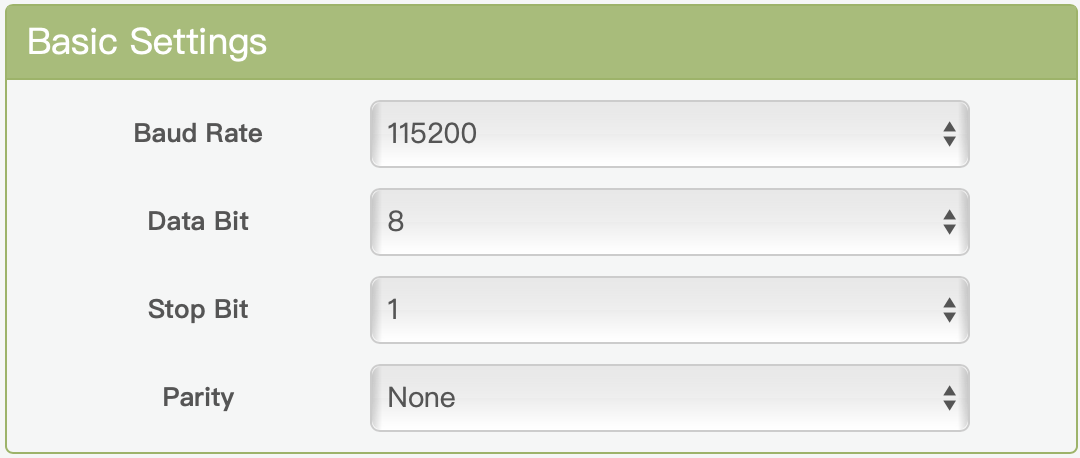
DSMR 4 and 5 meters are using 115200 baud 8N1 for serial settings
DSMR 2 and 3
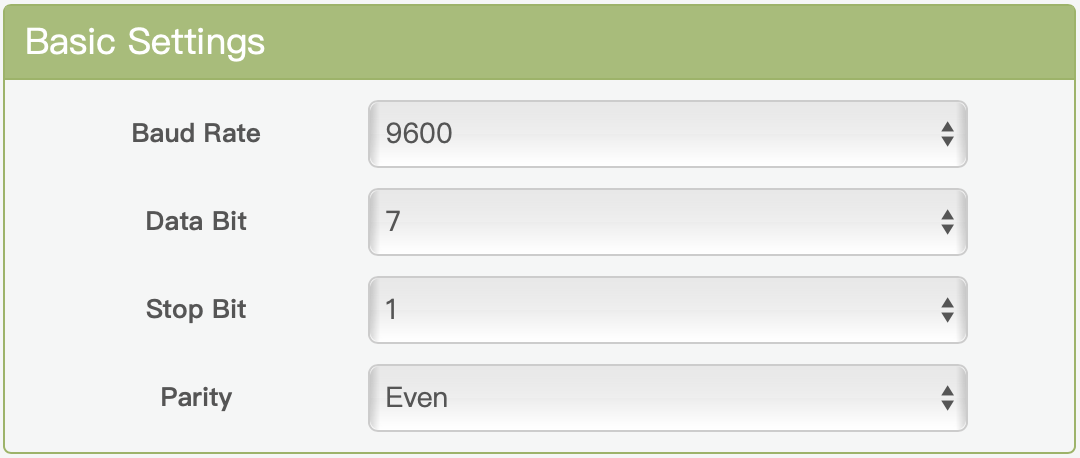
DSMR 2 and 3 meters are using 9600 baud 7E1 for serial settings
Changing the settings
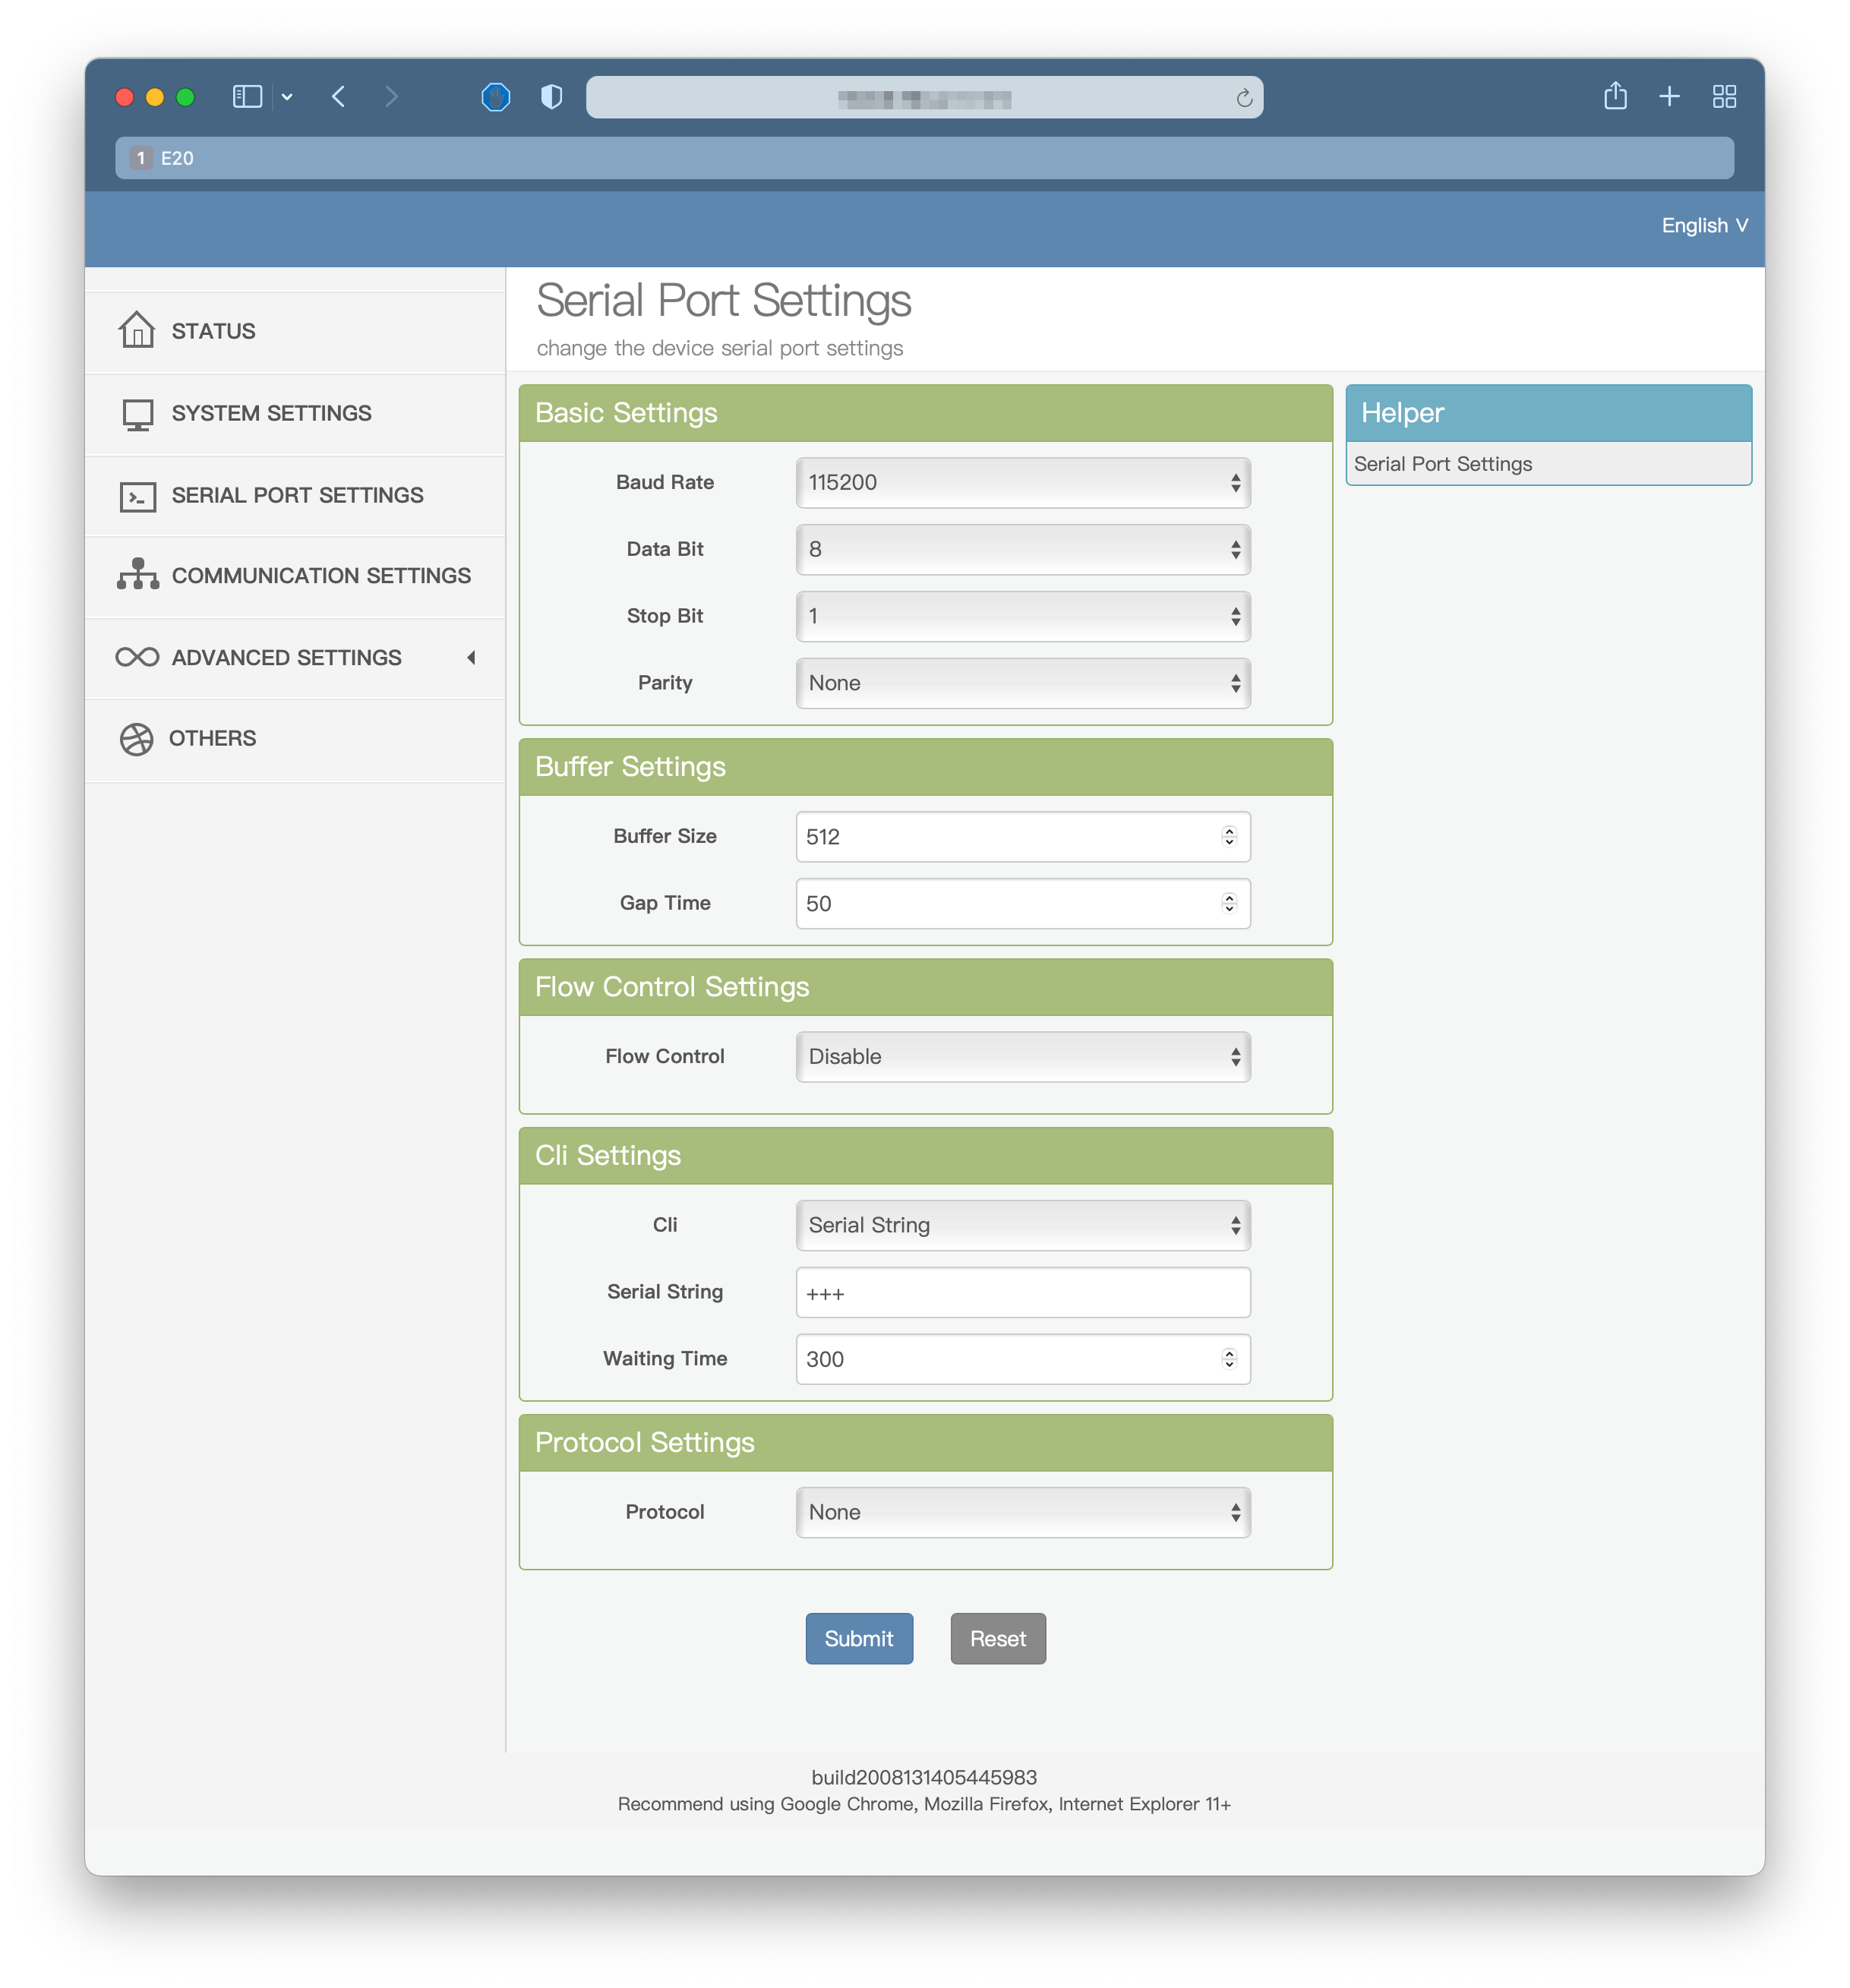
When the reader is connected to your network, open a browser on you computer, phone or tablet and navigate to the ip-address of the reader. It will prompt for username and password. By default that is admin/admin. In the menu, click on “serial port settings”:

There you’ll see the configuration page for the serial port:
When using DSMR 4 or 5 (default setting), use these basic setting:
When you’re not seeing any data, the chance is that your meter is DSMR 2 or 3. The settings for using a DSMR 2 or 3 is:
Dont forget to submit the settings
After changing the settings, click on submit on the bottom of the page, otherwise the changes won’t take place…